Halloween Candy Corn Mini Cheesecakes (Cute, Creamy, Party-Ready)
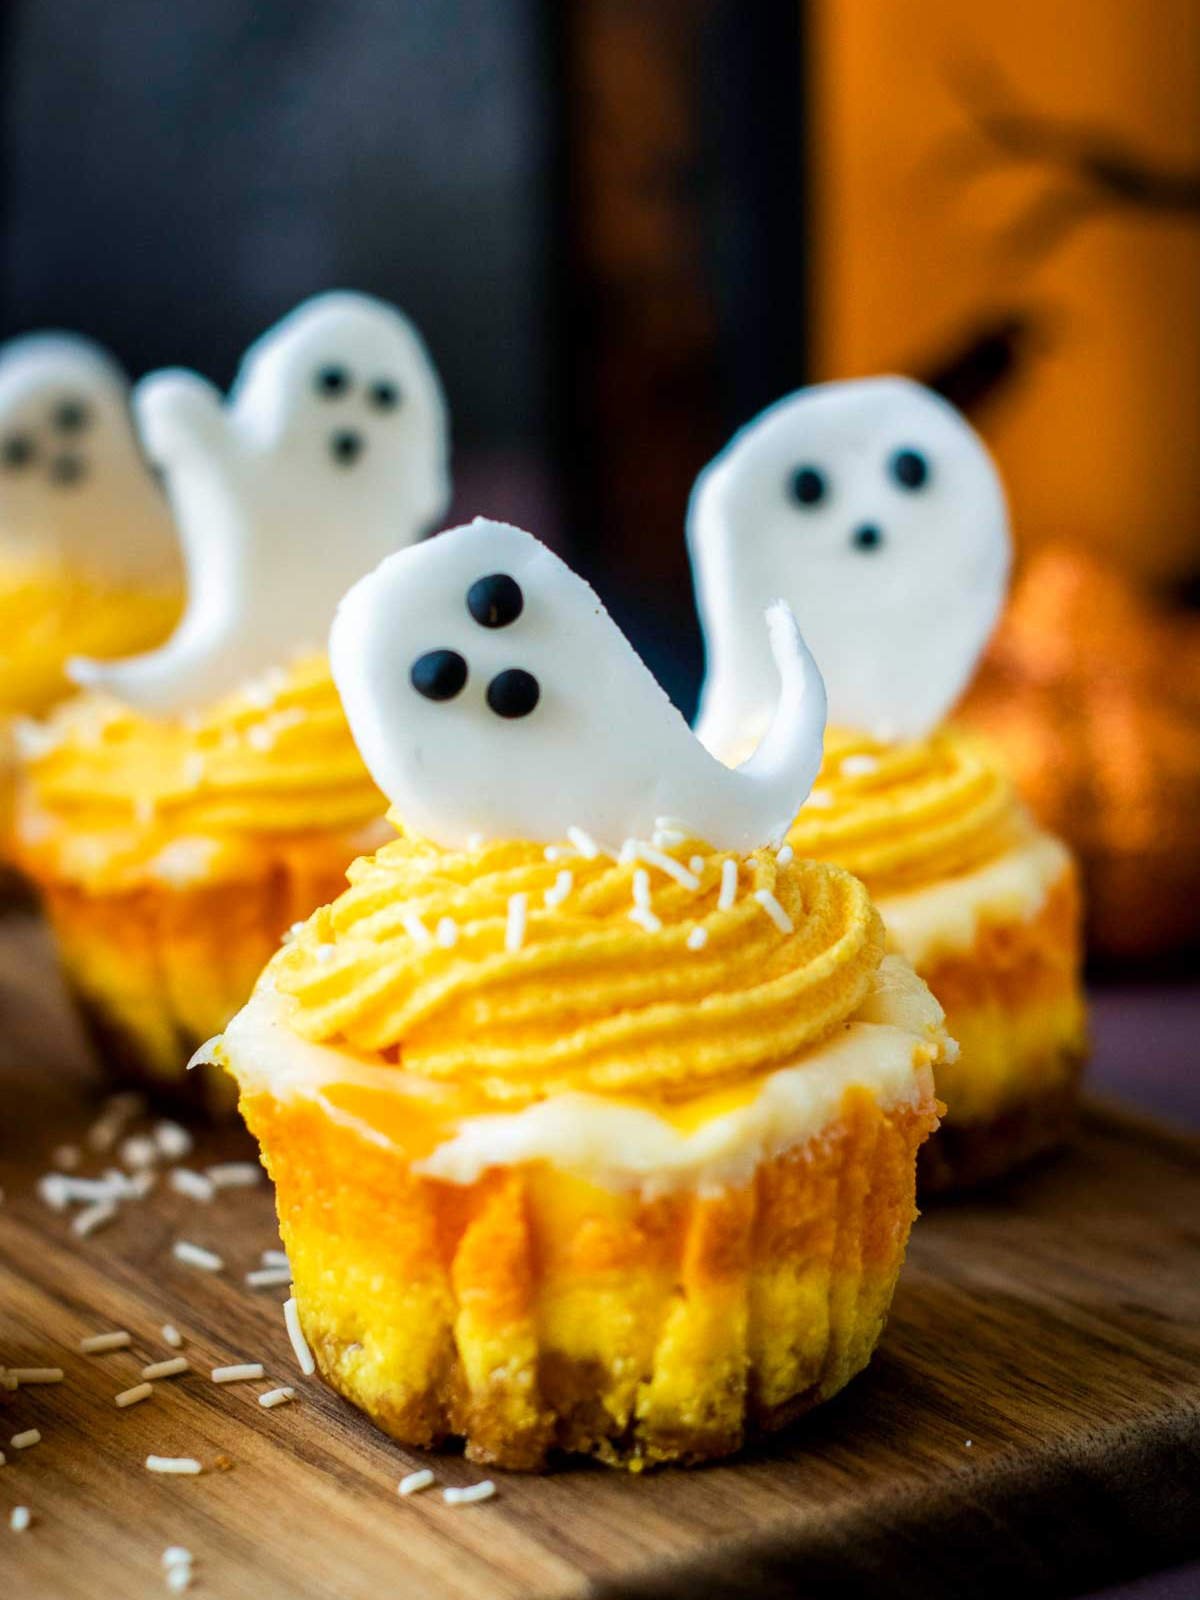
Halloween candy corn mini cheesecakes are little showstoppers. They're the kind of mini Halloween cheesecakes that bring color and fun to a party table. They're creamy, colorful, and fun to serve on a dessert platter alongside other festive treats. Cute enough for kids yet stylish enough for grown-up gatherings, these mini cheesecakes bring the right mix of festive and delicious to your fall celebrations.
Disclosure: This post may contain affiliate links. This means I get a small commission if you decide to make a purchase through my links at no extra cost to you.
The inspiration for these Halloween candy corn mini cheesecakes comes from the simple joy of candy corn itself. Love it or not, those bold stripes are a symbol of the season, and they translate beautifully into a dessert that feels both nostalgic and new. By keeping the classic cheesecake base and dressing it up with candy corn colors, you get a festive treat that's playful without being over-the-top.
Why You Will Love This Recipe
- The candy corn layers and ghost toppers instantly grab attention on a Halloween table.
- These mini Halloween cheesecakes are just the right size to serve without needing to slice or fuss.
- You can bake them ahead of time and add the decorations when you're ready.
- They're playful enough for kids and still have that creamy cheesecake flavor adults want.

Ingredients

See the recipe card for the complete list of ingredients and quantities.
Step-by-step Instructions

Step 1: Start with the crust by pressing the graham cracker mixture firmly into cupcake liners set in a muffin tin. A solid base helps the layers sit neatly once baked.

Step 2: Beat the cream cheese and sugar until creamy, then mix in eggs, vanilla, and sour cream. This creates the smooth cheesecake batter that's the heart of these mini desserts.

Step 3: Divide the batter evenly into three bowls. Tint one with yellow coloring, one with orange, and keep the last bowl plain to mimic the stripes of classic candy corn.

Step 4: Carefully spoon the yellow batter into each liner, followed by the orange batter, and then finish with the plain layer on top. The layers bake together to create the candy corn effect.

Step 5: Roll out white fondant on a flat surface to prepare for making the little ghost toppers. Keep the layer thin and even for the best results.

Step 6: Cut out ghost shapes from the fondant and add tiny eyes with black fondant or an edible marker. These decorations bring the spooky charm to life.

Step 7: Whip butter, powdered sugar, cream, and a touch of food coloring into a fluffy orange frosting.

Step 8: Pipe a generous swirl of frosting on each chilled cheesecake.

Add sprinkles and place a fondant ghost on top. Now they're ready to serve.
Expert Tips for Perfect Mini Cheesecakes
- Chill completely: These need at least 4 hours in the fridge to set, but overnight gives the best creamy texture.
- Use gel food coloring: Gel colors keep the layers vibrant without thinning the batter.
- Cool slowly: Let the cheesecakes rest in the pan for a few minutes before transferring them to the fridge to prevent cracking.
- Top just before serving: Frosting, sprinkles, and fondant ghosts look freshest when added at the last minute.
- Make ahead: Bake the mini Halloween cheesecakes a day before, then decorate the next day. They'll keep for up to three days in the fridge or can be frozen (without frosting) for up to a month.
Variations to Try
- Swap the graham cracker base for an Oreo crust to give the cheesecakes a darker, more dramatic Halloween look.
- Add a spoonful of pumpkin puree and a teaspoon of spice to the frosting for a fall-inspired twist.
- Keep the cheesecakes plain on top with just sprinkles for a simpler presentation if you're short on time.
- Make them extra sweet by topping with candy corn pieces or chunks of white chocolate candy.

More Halloween Recipes
- Air fryer mummy dogs are the kind of Halloween snack that instantly sets the mood. The flaky golden wrapping, playful candy eyes, and warm, savory bite make them a hit with kids and adults alike. They look festive on a platter, taste even better straight from the basket, and bring just the right amount of spooky charm to any party spread.
- Halloween candy bark is the kind of treat that disappears as quickly as it's set out. Each piece breaks into colorful shards of chocolate swirled with bright hues. Piled high on a tray, it looks like a burst of Halloween fun and doubles as an easy way to keep guests snacking all night long.
- Halloween Oreo treats are a simple but eye-catching way to dress up everyone's favorite cookie. Each one turns into a colorful little masterpiece once dipped, decorated, and dotted. They're fun to make, but even better to serve, since they add a pop of Halloween flair to dessert tables and vanish almost instantly once the party starts.
- Leftover Halloween candy hacks are the answer to that overflowing candy stash once trick-or-treating is over. Instead of letting it sit, these ideas transform it into desserts and snacks that feel brand new. From colorful barks to playful mix-ins, each hack breathes new life into sweets and keeps the Halloween fun going well past October 31st.
If you tried this Halloween Candy Corn Mini Cheesecakes Recipe or any other recipe on my website, please leave a 🌟 star rating and let me know how it went in the 📝 comments below.

Equipment
- 12-cup muffin tin
- Cupcake liners
- Electric hand mixer or stand mixer
- Spatula
- Rolling pin
- Piping bag with round or star tip
Ingredients
For the Crust:
- 1 cup graham cracker crumbs
- 2 tablespoons granulated sugar
- ¼ cup unsalted butter melted
For the Cheesecake Filling:
- 16 ounces cream cheese softened
- ½ cup granulated sugar
- 2 medium eggs
- 1 teaspoon vanilla extract
- ½ cup sour cream
- Orange and yellow food coloring
For the Orange Frosting:
- ½ cup unsalted butter softened
- 2 cups powdered sugar
- 2-3 tablespoons heavy cream
- 1 teaspoon vanilla extract
- Orange food coloring
For the Decorations:
- White sprinkles
- White fondant or sugar paste
- Black fondant food coloring, or edible marker
Instructions
Prepare the Crust:
- Preheat oven to 325℉. Line a 12-cup muffin tin with cupcake liners.
- In a medium bowl, mix graham cracker crumbs, sugar, and melted butter until combined.
- Divide the mixture between the liners, pressing firmly to create crusts. Bake for 5 minutes, then set aside.
Make the Cheesecake Filling:
- Beat softened cream cheese in a large bowl until smooth. Add sugar and mix until combined.
- Beat in eggs one at a time, then mix in vanilla and sour cream until creamy.
- Divide batter evenly into 3 bowls. Tint one yellow, one orange, and leave the third plain. Layer batters in each crust: yellow, orange, then white.
- Bake for 18-20 minutes, until centers are just set. Cool in pan for 30 minutes, then refrigerate at least 4 hours or overnight.
Prepare the Frosting:
- Beat butter until light and fluffy. Gradually mix in powdered sugar until smooth.
- Add heavy cream and vanilla, beating until fluffy. Tint with orange food coloring.
Decorate the Cheesecakes:
- Remove chilled cheesecakes from liners. Pipe orange frosting on top in a swirl. Sprinkle with white sprinkles.
- Roll out fondant and cut ghost shapes with a cookie cutter or freehand. Add eyes and a mouth with black fondant or edible marker.
- Place a ghost on each cheesecake. Serve immediately or store covered in the refrigerator for up to 3 days.
Notes
- For a firmer crust, press crumbs with the bottom of a glass before baking.
- Food coloring gels give more vibrant orange and yellow layers without thinning the batter.
- Let cheesecakes cool completely before chilling to avoid condensation on the tops.
- Fondant ghosts can be made 1-2 days ahead and stored in an airtight container.